You may not currently be using Slack for communication. Still, it is worth considering if you are working in a group (even for school projects) and aren’t using an alternative (beyond email). You can set up a Slack workspace for free and configure it for notifications.
I have a workspace set up for myself that I use with my family for sending lots of random stuff, but I also use it to test integrations I can then apply elsewhere.
Add Jenkins to Slack
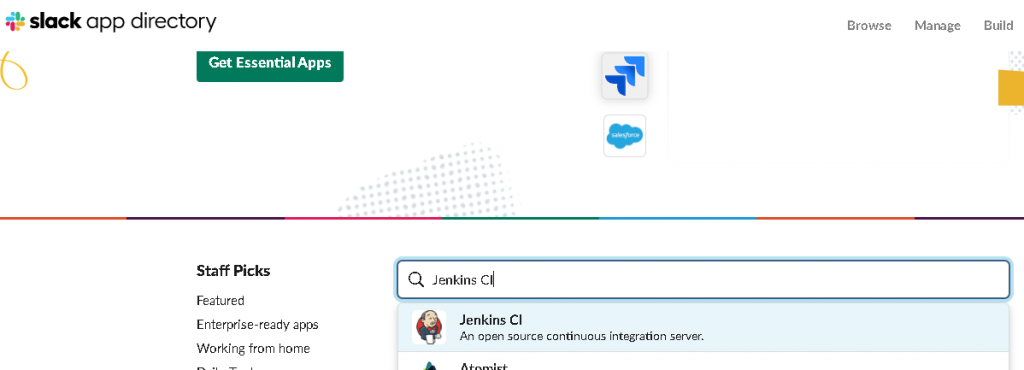
To add applications (apps) to Slack, you can go to https://<yourworkspace>.slack.com/apps. Under “Find a New App”, you can type in “Jenkins CI”:

You can then select the Add to Slack button:

Then, select a channel to post to automatically:

The crucial field is the token to use for the integration. You will want to save this for a later step. Go ahead and customize the other details as you wish.
Adding Slack to Jenkins
We’ll first need to add the Slack plugin to Jenkins:
- Go to Manage Jenkins ⇾ Manage Plugins ⇾ ‘Available’ tab.
- Select:

Once added, we’ll need to configure it in Manage Jenkins ⇾ Configure System.
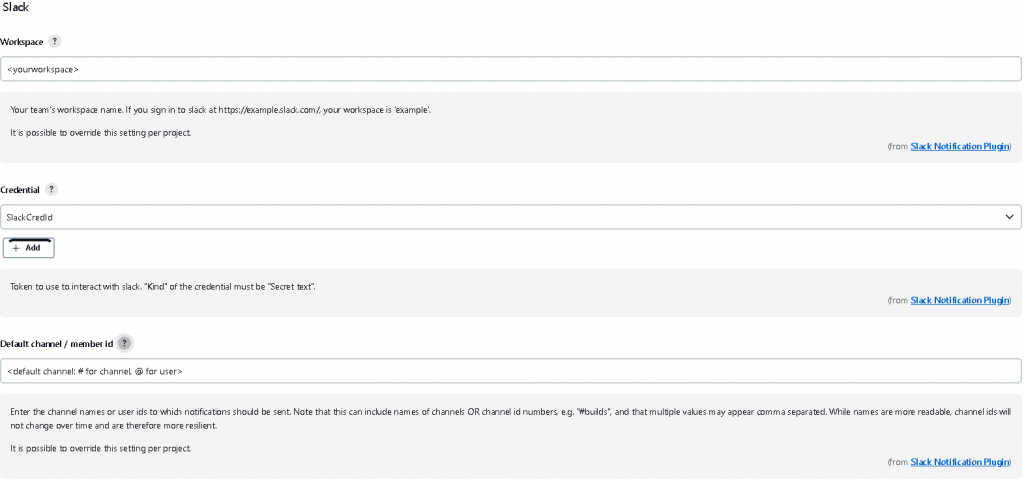
Slack will have its section for configuration:

To create the credentials for Slack, choose Add under Credential:

For now, the global domain is fine, but set the Kind to Secret text:

Then set the fields:

The secret is the Token field from the Jenkins CI integration into Slack.
Scripting Slack Notifications
The final stage is to script the notifications in our Jenkinsfile.groovy pipeline.
The stage to report the start of the job:
        stage('Send start notification') {
            steps {
                script {
                    slackSend(message: "Build Started: ${env.JOB_NAME} ${env.BUILD_NUMBER} (<${env.BUIlD_URL}|Open>)")
                }
            }
        }
We add steps in the post block of the script which occur at the end of the build process based on the status. We’ll want to merge the following into our existing post block:
    post {
        failure {
            slackSend(color: 'danger', message: "Build Failed! ${env.JOB_NAME} ${env.BUILD_NUMBER} (<${env.BUIlD_URL}|Open>)"
        }
        unstable {
            slackSend(color: 'warning', message: "Build Unstable! ${env.JOB_NAME} ${env.BUILD_NUMBER} (<${env.BUIlD_URL}|Open>)"
        }
        success {
            slackSend(color: 'good', message: "Build Succeeded! ${env.JOB_NAME} ${env.BUILD_NUMBER} (<${env.BUIlD_URL}|Open>)")
        }
    }
To get the post block of:
    post {
        failure {
            slackSend(color: 'danger', message: "Build Failed! ${env.JOB_NAME} ${env.BUILD_NUMBER} (<${env.BUILD_URL}|Open>)")
        }
        unstable {
            slackSend(color: 'warning', message: "Build Unstable! ${env.JOB_NAME} ${env.BUILD_NUMBER} (<${env.BUILD_URL}|Open>)")
        }
        success {
            slackSend(color: 'good', message: "Build Succeeded! ${env.JOB_NAME} ${env.BUILD_NUMBER} (<${env.BUILD_URL}|Open>)")
        }
        always {
            archiveArtifacts(artifacts: "sast-report.sarif", allowEmptyArchive: true, onlyIfSuccessful: false)
        }
        cleanup {
            cleanWs(deleteDirs: true, disableDeferredWipeout: true, notFailBuild: true)
        }
Now when we run the job, we’ll get:

There are additional features worth exploring, such as specifying:
- channel: an alternative channel to post to instead of the default
- notifyCommitters: alert those who committed changes as part of the run of the status
There are plenty more options for the Slack Notification Plugin, such as doing the initial post then creating additional posts in a thread of that post with more details, alternate name or emoji in the post, etc.
