The next step is to get Jenkins to search GitHub for repositories to build.
I want all the projects in my GitHub repository that qualify to be built automatically, so if I add a new project with the right setup, it will automatically build it.
This can be achieved by having Jenkins scan your GitHub repository to gather all projects. GitHub supports pushing to Jenkins when repositories change, but that is more complicated when Jenkins is behind a firewall and cannot be directly contacted (we’ll be relying on polling in this case instead).
Before we can create our first job, we’ll need to set up Credentials for Jenkins to interact with our GitHub organization.
GitHub Credentials
Setting up credentials for Jenkins to access GitHub takes only a few steps to generate the token in GitHub and add it to Jenkins:
- Go to: https://github.com/settings/tokens, this is the set of tokens you can create for other applications to access your repositories (you’ll need to log in of course).
- Select ‘Personal Access Tokens’
- Select ‘Generate new token’ in the upper right
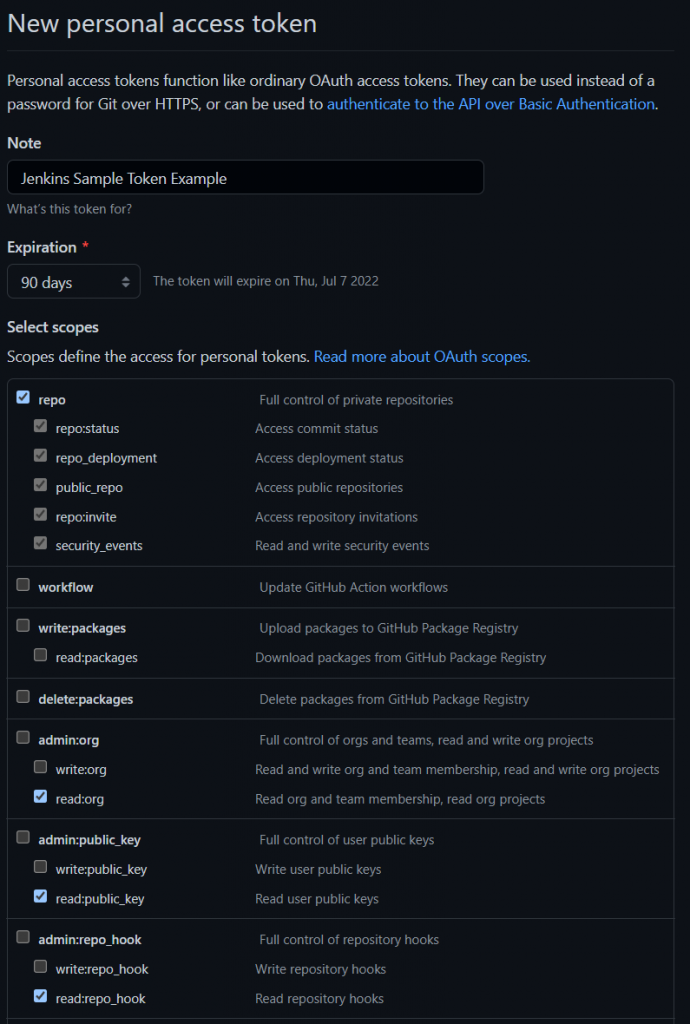
- Give it a meaningful name so you know what you are using it for (in my case: Jenkins Sample Token Example).
- You can set an expiration (or set it to never so that it will always be good, but dangerous if your computer is compromised).
- Now we want to set a variety of permissions. Some of them will be useful now, some will be useful for what we want to do later (like marking a particular change in GitHub as passing or failing). You can update these permissions for the token later as well. One you cannot see in the image below is ‘notifications’. That will be useful to enable as well.
- At the bottom is the option to ‘Generate token’.
- This will create a key in the list you will want to copy because once you navigate away from this page, the key will no longer be accessible. This is what we will store as a password in Jenkins.

GitHub Credentials in Jenkins
We now need to add the credentials to Jenkins to access GitHub. To do so we’ll need to set up the credentials in Jenkins Credentials Manager by going to Jenkins ⇾ Manage Jenkins.
Next, we’ll want to Manage Credentials:
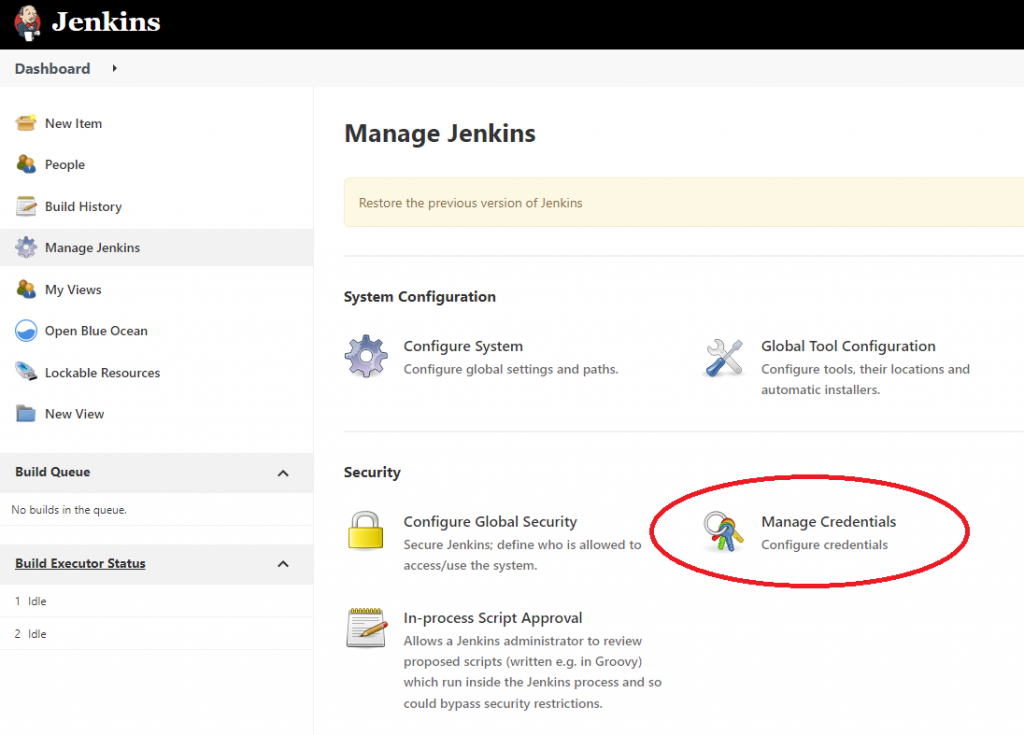
We want to manage the credentials in the Jenkins scope, then select Global credentials:

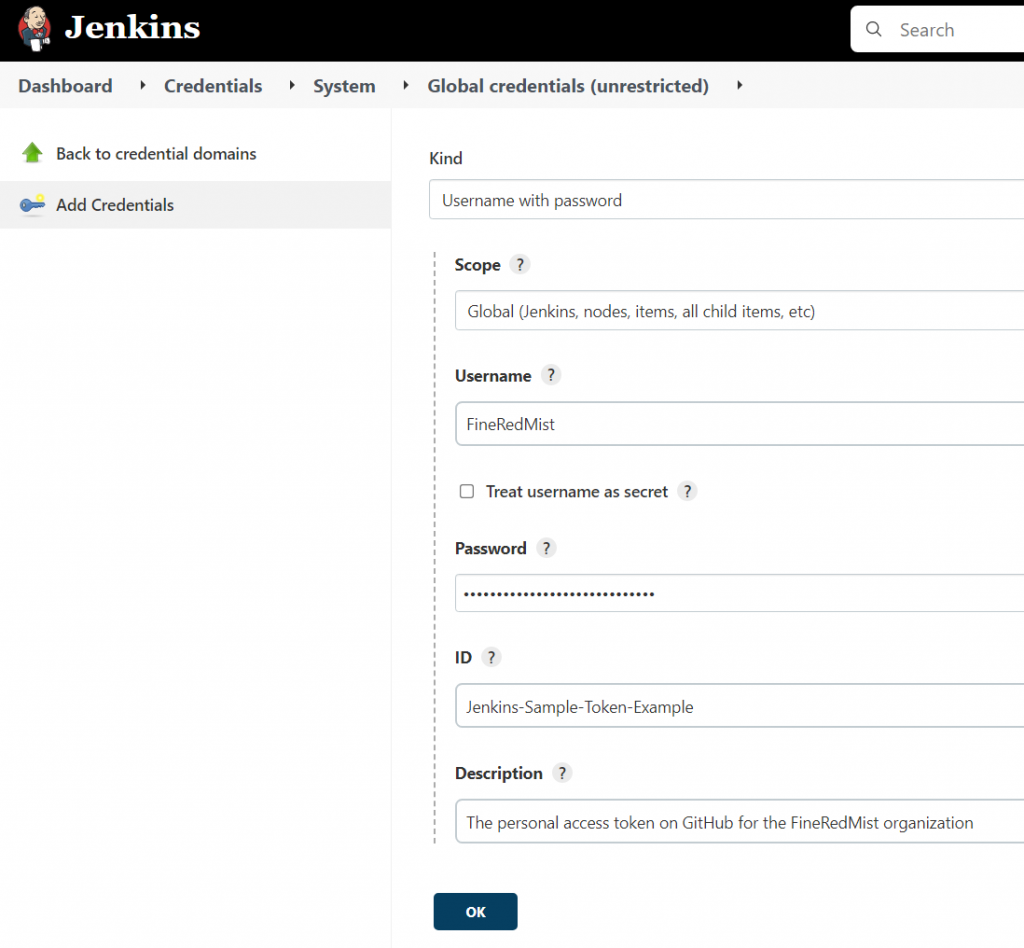
Finally, we’ll add some credentials:

GitHub uses the Username with password credentials, where we’ll set the username to whatever you like and the ID is what will appear when we select it for our new Jenkins job.
The password is the text we copied from GitHub:
Creating the Jenkins Job for the Organization
Let’s start by creating the first job:
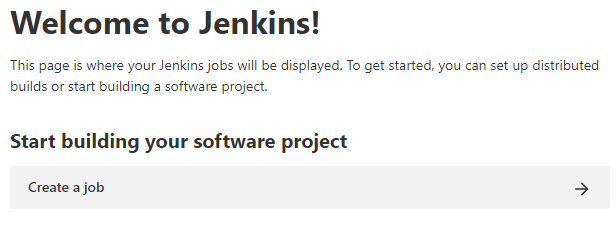
Your collection of GitHub repositories is an organization, so that is the kind of job we’ll create. I’ll name this “Sample Projects”:

Configure GitHub in the Job
Both the job and GitHub will require changes to support having Jenkins retrieve builds. Let’s start with the Jenkins job:

There are a number of options of interest, but the settings of importance are:
Credentials
This is where we select the credentials we created earlier:

Owner/Organization
You can get the owner or organization from your login at GitHub as the name you set when creating it:


Additional Job Settings
I recommend changing the extension for Jenkinsfile to indicate the language (groovy) which can be used for syntax highlighting (we can create this file in Visual Studio in the project later to build the job).

You may want to scan more frequently than daily if you do quite a bit of development in GitHub:

You also don’t want to fill up Jenkins with logs. So you can discard old builds. I generally won’t need more than the last 10 build results, your needs may differ:

Validate!
Once we commit our changes, Jenkins will run a scan, on the left-hand side there is an option to ‘Scan Organization Now’ which will try to find any repositories with our Jenkinsfile.groovy. The results of the scan will be in the ‘Scan Organization Log’ and look something like:
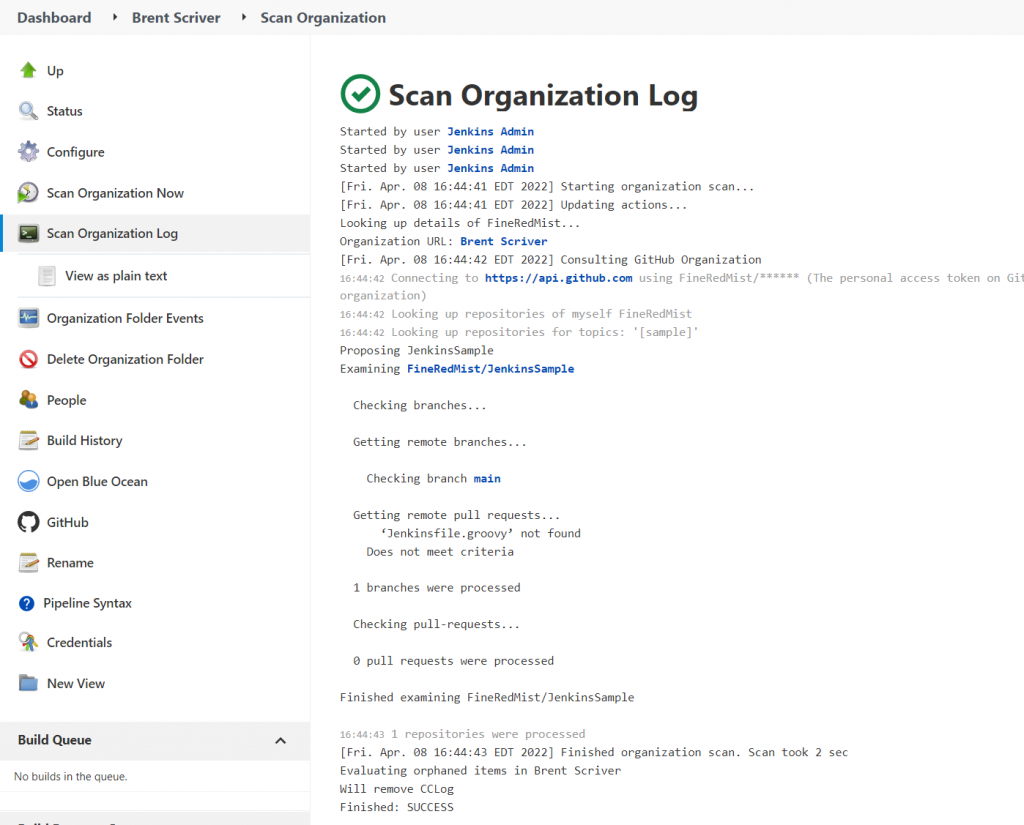
There won’t be anything in the list of projects to build yet as Jenkins isn’t finding the Jenkinsfile.groovy in the GitHub repository, but now that we have Jenkins scanning, we can work on the next steps for building our C# project in Jenkins!

Pingback: CI/CD Building a C# Project in Jenkins | Brent Scriver
Pingback: CI/CD Building a C# Project in Jenkins | Brent Scriver